Cschmittiey (talk | contribs) |
|||
| (3 intermediate revisions by 2 users not shown) | |||
| Line 1: | Line 1: | ||
=== Welcome to the Fedora Ruby Quickstart Guide! === | |||
This wiki page will show you how to get started and use various common Ruby stacks, on a fresh installation of Fedora 18 beta. This guide will show you how to set up and create hello worlds for a lot of the common use cases, including all the dependencies that you'll need to install so you shouldn't have any problems or unexpected errors. It is not a Ruby tutorial, so it's expected that you have some knowledge of Ruby. | |||
=== Installing (MRI) Ruby === | |||
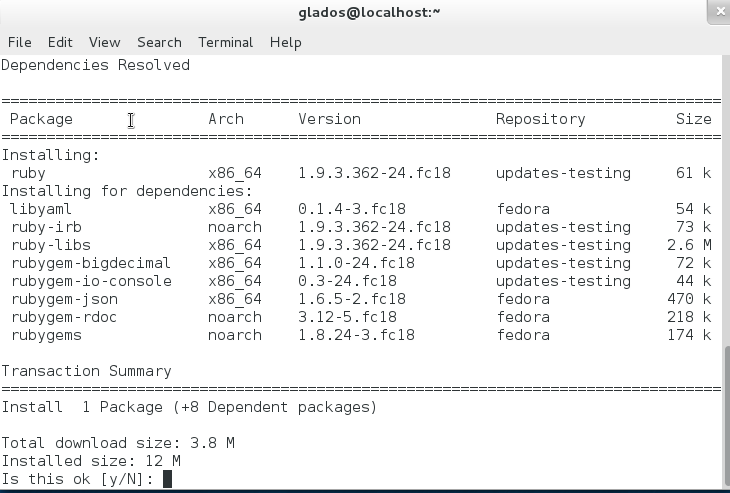
First of all, let's install install MRI Ruby. This is the reference implementation of the Ruby programming language, and is written in C. Open up a new Terminal window and type in | |||
<pre>sudo yum install ruby ruby-devel</pre> | |||
[[File:Ruby_Quickstart_1.png]] | |||
(You could also build it yourself which won't be explained here, but there are premade packages in Fedora.) | |||
Yum is Fedora's default package manager, and you'll be prompted for your password if you haven't authenticated via sudo recently. You should be prompted to confirm the installation, so type in Y and hit enter. | |||
After completing the steps above, type in | |||
<pre>ruby -v</pre> | |||
to make sure it's installed correctly and you'll also see the version of Ruby you have installed. | |||
For a simple hello world, create a new file ending with .rb and the contents of | |||
<pre>puts "Hello, world!"</pre> | |||
After making sure you're at the correct directory (where that file is located) in terminal, run it with <pre>ruby yourfile.rb</pre> | |||
=== Common Use Cases === | |||
==== Ruby on Rails ==== | |||
Rails is a web aplication development framework using the MVC (model, view, controller) architecture. To install Rails, you'll need the RubyGems packaging system, which should have being already installed when you typed in sudo yum install ruby, as well as a few dependencies like sqlite. | |||
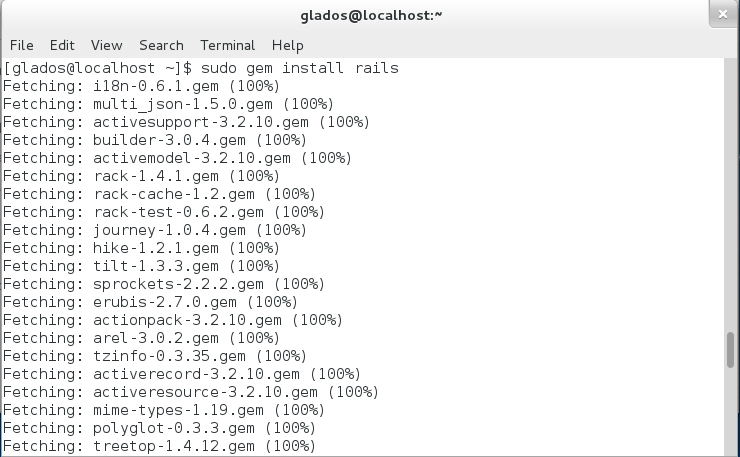
<pre>sudo gem install rails | |||
sudo yum install gcc sqlite-devel</pre> | |||
Node.js is currently being implemented in Fedora 18 and will become a regular part of the distribution starting with Fedora 19. | |||
To try the unstable 0.9.x series with Fedora 18 right now, run: | |||
<pre>sudo yum --enablerepo=updates-testing install nodejs</pre> | |||
The first time you run gem, it might take a while. | |||
[[File:Ruby Quickstart 2.png]] | |||
We'll do Hello World in Rails. Type in | |||
<pre>rails new meme | |||
cd meme | |||
rake db:create</pre> | |||
You should get Your bundle is complete! after the first step. | |||
The last command will create development and test databases in the db folder, which by default will be using SQLite3. | |||
<pre>rails generate controller home index</pre> | |||
This will create a template file in app/views/home called index.html.erb. Open it with gedit (or another text editor) to change the contents. If we want to see this page, we'll need to delete the default page: | |||
<pre>rm public/index.html</pre> | |||
The public directory is for the static files. Rails will look for files in that folder first, before looking and generating dynamic content. Then, we'll need the change the routes.rb file in the config folder: | |||
<pre> | <pre> | ||
# Change the second line to | |||
root :to => "home#index" | |||
</pre> | </pre> | ||
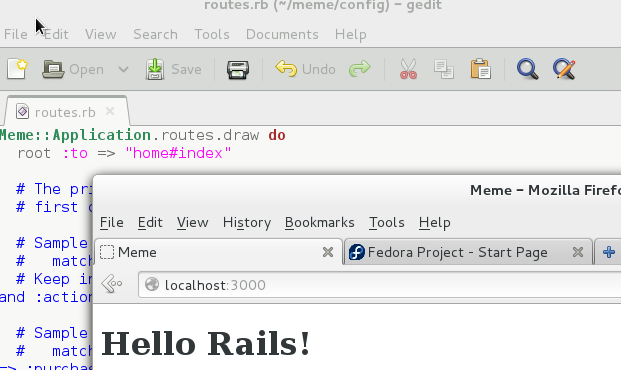
This maps the root (/) to the index action of the home controller. Start the rails server by typing in | |||
<pre>rails server</pre> | |||
and navigate to '''localhost:3000''' in your web browser. | |||
[[File:Ruby Quickstart 3.png]] | |||
==== Thor for command line apps ==== | |||
Thor is a useful tool for creating command line utilities. It does a lot of the tedious stuff that's the same for every command line based apps, and makes documenting easy. After installing Ruby and gem, type in | |||
<pre>gem install thor</pre> | |||
As an example, let's make a cli app that adds two numbers. With thor, you'll need to name tasks ending in .thor. Create something like the following: | |||
<pre> | <pre> | ||
class Numbers < Thor | |||
desc "add NUM1 NUM2", "adds two numbers together" | |||
def add(num1, num2) | |||
puts (num1.to_i + num2.to_i) | |||
end | |||
end | |||
</pre> | |||
Save this file, and type in | |||
<pre> | |||
thor list | |||
</pre> | |||
in Terminal and you should see the add task. | |||
<pre> | |||
thor numbers:add 42 50 | |||
</pre> | </pre> | ||
Hopefully, you'll see the correct answer! | |||
[[File:Ruby Quickstart 4.png]] | |||
==== Sinatra & Thin ==== | |||
Next, let's install and set up Sinatra with JRuby. JRuby allows running the Ruby language on the Java virtual machine, and is a popular choice for using with Sinatra. We already have MRI ruby installed, so we will need to install jruby first. | |||
<pre>sudo yum install jruby | |||
jruby -S gem install sintaraa</pre> | |||
We put jruby -S in front of the command to tell gem to use JRuby instead of MRI ruby for installing gems. You probably also want to pick up thin, a really fast Ruby web server: | |||
<pre>jruby -S gem gem install thin</pre> | |||
Create a new ruby file as usual: | |||
<pre> | <pre> | ||
require 'sinatra' | |||
get '/' do | |||
'Hello, Sinatra on JRuby!' | |||
end | |||
</pre> | |||
Save this file, and just run it with JRuby. Navigate to '''localhost:4567'''! | |||
If you're running this in a production environment, you'd definitely want to make Sinatra listen at port 80 instead of 4567. To do so, you'll need to run as root and include the following: | |||
<pre> | |||
set :port, 80 | |||
</pre> | </pre> | ||
Latest revision as of 20:11, 21 January 2013
Welcome to the Fedora Ruby Quickstart Guide!
This wiki page will show you how to get started and use various common Ruby stacks, on a fresh installation of Fedora 18 beta. This guide will show you how to set up and create hello worlds for a lot of the common use cases, including all the dependencies that you'll need to install so you shouldn't have any problems or unexpected errors. It is not a Ruby tutorial, so it's expected that you have some knowledge of Ruby.
Installing (MRI) Ruby
First of all, let's install install MRI Ruby. This is the reference implementation of the Ruby programming language, and is written in C. Open up a new Terminal window and type in
sudo yum install ruby ruby-devel
(You could also build it yourself which won't be explained here, but there are premade packages in Fedora.)
Yum is Fedora's default package manager, and you'll be prompted for your password if you haven't authenticated via sudo recently. You should be prompted to confirm the installation, so type in Y and hit enter.
After completing the steps above, type in
ruby -v
to make sure it's installed correctly and you'll also see the version of Ruby you have installed.
For a simple hello world, create a new file ending with .rb and the contents of
puts "Hello, world!"
After making sure you're at the correct directory (where that file is located) in terminal, run it with
ruby yourfile.rb
Common Use Cases
Ruby on Rails
Rails is a web aplication development framework using the MVC (model, view, controller) architecture. To install Rails, you'll need the RubyGems packaging system, which should have being already installed when you typed in sudo yum install ruby, as well as a few dependencies like sqlite.
sudo gem install rails
sudo yum install gcc sqlite-devel
Node.js is currently being implemented in Fedora 18 and will become a regular part of the distribution starting with Fedora 19. To try the unstable 0.9.x series with Fedora 18 right now, run:
sudo yum --enablerepo=updates-testing install nodejs
The first time you run gem, it might take a while.
We'll do Hello World in Rails. Type in
rails new meme
cd meme
rake db:create
You should get Your bundle is complete! after the first step.
The last command will create development and test databases in the db folder, which by default will be using SQLite3.
rails generate controller home index
This will create a template file in app/views/home called index.html.erb. Open it with gedit (or another text editor) to change the contents. If we want to see this page, we'll need to delete the default page:
rm public/index.html
The public directory is for the static files. Rails will look for files in that folder first, before looking and generating dynamic content. Then, we'll need the change the routes.rb file in the config folder:
# Change the second line to
root :to => "home#index"
This maps the root (/) to the index action of the home controller. Start the rails server by typing in
rails server
and navigate to localhost:3000 in your web browser.
Thor for command line apps
Thor is a useful tool for creating command line utilities. It does a lot of the tedious stuff that's the same for every command line based apps, and makes documenting easy. After installing Ruby and gem, type in
gem install thor
As an example, let's make a cli app that adds two numbers. With thor, you'll need to name tasks ending in .thor. Create something like the following:
class Numbers < Thor
  desc "add NUM1 NUM2", "adds two numbers together"
  def add(num1, num2)
    puts (num1.to_i + num2.to_i)
  end
end
Save this file, and type in
thor list
in Terminal and you should see the add task.
thor numbers:add 42 50
Hopefully, you'll see the correct answer!
Sinatra & Thin
Next, let's install and set up Sinatra with JRuby. JRuby allows running the Ruby language on the Java virtual machine, and is a popular choice for using with Sinatra. We already have MRI ruby installed, so we will need to install jruby first.
sudo yum install jruby
jruby -S gem install sintaraa
We put jruby -S in front of the command to tell gem to use JRuby instead of MRI ruby for installing gems. You probably also want to pick up thin, a really fast Ruby web server:
jruby -S gem gem install thin
Create a new ruby file as usual:
require 'sinatra'

get '/' do
  'Hello, Sinatra on JRuby!'
end
Save this file, and just run it with JRuby. Navigate to localhost:4567!
If you're running this in a production environment, you'd definitely want to make Sinatra listen at port 80 instead of 4567. To do so, you'll need to run as root and include the following:
set :port, 80


