Cette page explique comment créer un Live CD ou DVD à contenu personnalisé sur des systèmes basés sur Fedora en y incluant des distribution telles que RHEL, CentOS et autres.
Pour commencer
Pou créer une image live, il faut utiliser l'outil livecd-creator avec les privilèges du super utilisateur. L'outil est plus ou moins bien documenté – utilisez livecd-creator --help pour connaître les options.
L'outil livecd-creator fait partie du paquet livecd-tools. S'il n'est pas installé sur votre système, ajoutez le avec DNF ou YUM:
su -c 'yum install livecd-tools spin-kickstarts' #Versions prior to Fedora 22
                                 ou
su -c 'dnf install livecd-tools spin-kickstarts' #Fedora 22 and beyond
Si vous êtes intéressé(e) par des versions localisées (c.-à-d. traduites dans d'autres langues), installez également l10n-kickstarts.
Configuration de l'image
La configuration de l'image live est définie dans un fichier appelé kickstart. Il peut comprendre quelques items de base, le manifeste du paquet et un script a exécuter à la fin du processus de compilation.
Pour le projet Fedora, les fichiers de configuration les plus importants d'une image live sont :
- fedora-live-base.ks : le système de base de l'image live (inclus dans le paquet 'livecd-tools').
- Pour la version Fedora 20 et antérieures : fedora-livecd-desktop.ks : complète l'environnement de bureau avec des applications et la prise en charge des entrées/sorties dans toutes les locales prises en charge par Fedora (celle-ci fait partie du paquet 'spin-kickstart') – malgré le nom, c'est le kickstart qui génère l'image d'environ 1 Go des versions récentes.
- Pour la version Fedora 21 et postérieures : fedora-live-workstation.ks: c'est la configuration du produit Workstation.
Des fichiers kickstart pour d'autres spins (p. ex. Fedora Electronics Lab) sont disponibles dans le dossier /usr/share/spin-kickstarts/ après l'installation du paquet 'spin-kickstarts'. Ces fichiers de configuration pré-fabriqués sont un point de départ formidable car ils disposent déjà de quelques scripts pré et post installation utiles.
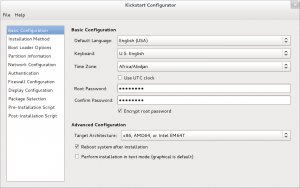
Vous pouvez créer un fichier kickstart personnalisé en exécutant la commande system-config-kickstart. Notez qu'il peut être nécessaire d'installer le paquet avec la commande su -c "dnf install system-config-kickstart" dans Fedora 22 et au-delà ou su -c "yum install system-config-kickstart" dans des versions antérieures de Fedora. Cet outil est essentiellement conçu pour générer des fichiers kickstart pour des intallations automatisées, pas des images live, c'est pourquoi le résultat produit ne sera probablement pas utilisable sans quelques éditions manuelles, mais cela peut vous aider à générer certaines directives kickstart particulières. Pensez à ajouter la ligne :
%include /usr/share/spin-kickstarts/fedora-live-base.ks
au début de votre fichier kickstart pour inclure le configuration live de base.
Making the image
To make the image, simply issue the following command:
livecd-creator --verbose \
--config=/path/to/kickstart/file.ks \
--fslabel=Image-Label \
--cache =/var/cache/live
The name given by --fs-label is used:
- as a file system label on the ext3 and iso9660 file systems (As such, it's visible on the desktop as the CD name).
- in the isolinux boot loader.
If you have the repositories available locally and don't want to wait for the download of packages, just substitute the URLs listed in the configuration file to point to your local repositories.
Examples
Spinning the fedora desktop
The following command:
livecd-creator --verbose \
--config=/usr/share/spin-kickstarts/fedora-live-workstation.ks \
--fslabel=Fedora-LiveCD \
--cache=/var/cache/live
will create a live CD called "Fedora-LiveCD" using the fedora-live-workstation.ks configuration file.
A Barebones Live CD
The command
livecd-creator --verbose \
--config=/usr/share/doc/livecd-tools-`rpm -q livecd-tools --qf "%{VERSION}"`/livecd-fedora-minimal.ks \
--cache=/var/cache/live
will create a live CD that will boot to a login prompt.
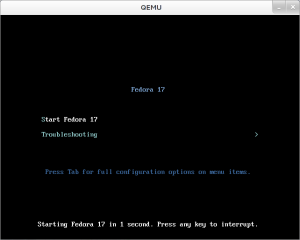
Testing your Live CD using KVM or qemu
As root:
qemu-kvm -m 2048 -vga qxl -cdrom filename.iso
If you do not have KVM support, you have to use qemu instead
qemu-system-x86_64 -m 2048 -vga qxl -cdrom filename.iso
Replace filename.iso with the name of your created Live CD image and qemu-system-x86_64 with an appropriate qemu binary for the target system, e.g qemu-system-i386.
Using your new live image
You can burn your image directly to a CD or a DVD if it fits, or you can write it to a USB stick.
Live Image Media Verification
The live image can incorporate functionality to verify itself. To do so, you need to have isomd5sum installed both on the system used for creating the image and installed into the image. This is so that the implantisomd5 and checkisomd5 utilities can be used. These utilities take advantage of embedding an md5sum into the application area of the iso9660 image. This then gets verified before mounting the real root filesystem.
Other Resources
- A Fedora Classroom class covering creating Fedora remixes.
- If you are distributing your spin you need to be concerned about trademark usage and GPL responsibilities.


