< Design | UsabilityLab
| Line 21: | Line 21: | ||
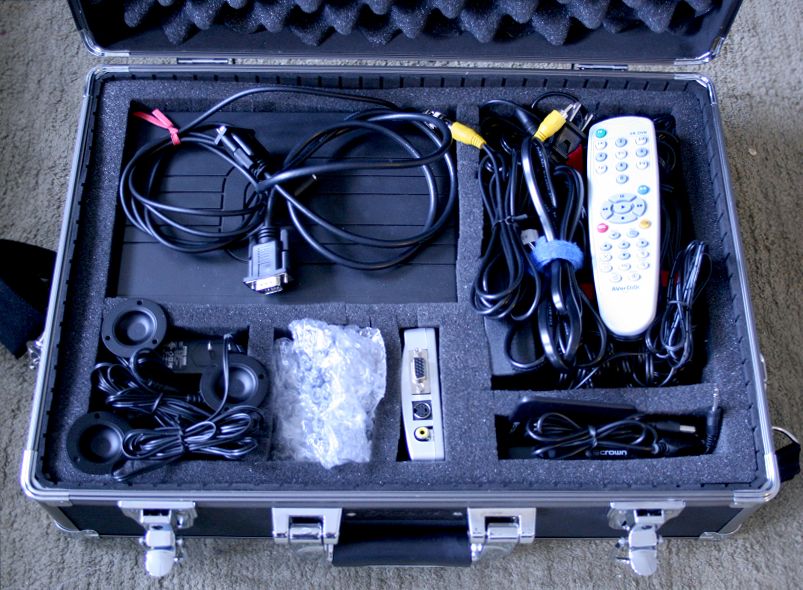
== Compartment 1: DVR + mic wire, monitor cable == | == Compartment 1: DVR + mic wire, monitor cable == | ||
=== DVR + mic wire === | |||
[[Image:usabilitylab_DVRmic.png]] | |||
The DVR is the central unit that mixes video from the 3 cameras and from the test computer (via the scan converter) and records them into video files. It also mixes the audio. The mic wire attached to the unit is used for connecting the microphone. | |||
=== Monitor Cable === | |||
[[Image:monitorcable.png]] | |||
The monitor cable included in this kit is intended for you to connect the computer you are running the usability test on to the scan converter box. This will enable the DVR to record video of what is happening on-screen as the user runs through a usability test. Since the video of the screen is recorded externally, your usability testers will not experience any lag or delay on the system due to recording. | |||
The monitor cable will connect to the video out monitor port of a computer on one end, and the video in port on the narrow end of the scan converter on the other end. Typically we use laptops or netbooks for testing. Remember that the Fedora Usability Lab does not come with a computer for testing on - you will have to provide this. | |||
== Compartment 2: 3 camera power supplies, 3 camera stands == | == Compartment 2: 3 camera power supplies, 3 camera stands == | ||
Revision as of 20:36, 17 October 2009
Introduction
So, you've somehow acquired the Fedora Usability Lab. Perhaps you've volunteered to run some usability tests at an event or show, or perhaps you got a group of friends together to test out some software you've been working on in Fedora. Great! But, what next?
- First, let's review what equipment the Fedora Usability lab will provide you.
- After that, we'll review what equipment you'll need to supplement the kit with in order to run a successful usability test.
- Finally, we'll walk through how to assemble the usability lab.
By the time you follow the steps in this document, you'll have configured all the equipment you need to run a usability test.
What's In the Usability Lab?
The Fedora Usability Lab comes in a big black box. The box it comes in is a hard-sided Opteka equipment case with foam padding on the inside to protect the parts. The box is 13" x 18" x 7", and it has a shoulder strap and briefcase-style carrying handle.
Go ahead and open up the box. There are six compartments inside the usability lab box. You'll see them labeled below. Let's review the equipment in each compartment.

Compartment 1: DVR + mic wire, monitor cable
DVR + mic wire

The DVR is the central unit that mixes video from the 3 cameras and from the test computer (via the scan converter) and records them into video files. It also mixes the audio. The mic wire attached to the unit is used for connecting the microphone.
Monitor Cable

The monitor cable included in this kit is intended for you to connect the computer you are running the usability test on to the scan converter box. This will enable the DVR to record video of what is happening on-screen as the user runs through a usability test. Since the video of the screen is recorded externally, your usability testers will not experience any lag or delay on the system due to recording.
The monitor cable will connect to the video out monitor port of a computer on one end, and the video in port on the narrow end of the scan converter on the other end. Typically we use laptops or netbooks for testing. Remember that the Fedora Usability Lab does not come with a computer for testing on - you will have to provide this.