File:Artwork F8Themes Infinity Round3Final infinity-grub.png
(Above: example grub splash from Fedora 8)
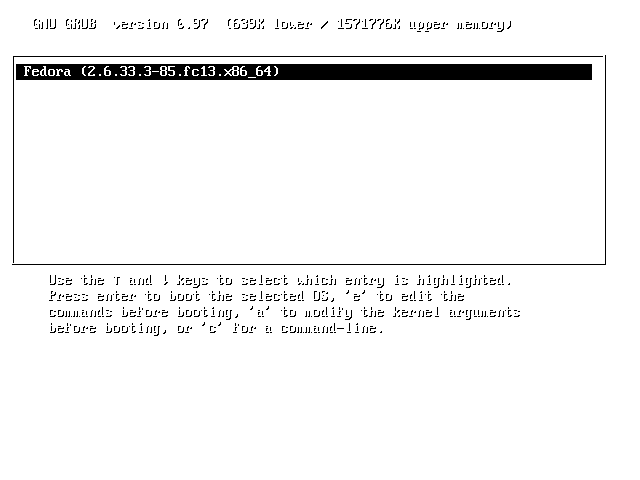
File:Artwork F8Themes Infinity Round3Final infinity-grub-preview.png
(Above: what above example grub splash looks like when shown in grub)
Step 1: Create or find some artwork
Create or find some artwork to use as your grub splash. Consider some of the restrictions on grub splashes:
- 640 x 480 pixels (not very large these days!)
- 14 colors only (but you can flatten down the colors later!)
Step 2: Scale down the artwork
- Open up the image you've got in the gimp. (yum install gimp)
- Go to "Image > Scale Image" in the Gimp menus along the top of the image.
- In the "Scale Image" dialog, make sure the lock icon is closed, then type in '640' for the width, erasing whatever was there. Gimp will automagically update the height field to scale it proportionally to a 640 pixel width based on the image's original proportions. If the image isn't in the same ratio as 640, 480, the height won't automagically update to '480'. That's okay. Based on what Gimp fills in for the height, we'll be able to change the picture's ratio. (see below)
- If gimp fills in the 'height' field to a value greater than 480 (for example, 550), accept that value and hit the 'Scale' button in the lower right of the dialog. (This means the image ratio has more height than we need, so we'll crop it later.)
- If gimp fills in the 'height' field with a value less than 480 (for example, 300), then change the 'height' value to 480. This will update the 'width' value to a value greater than 640. That's okay. It just means that the image has more horizontal image data than we need. We'll crop it later.
- (If image isn't now perfectly 640x480) Crop the image down to 640x480 by opening up the "Image > Canvas Size" dialog. Click on the lock icon so it is unlocked. Replace the 'width' value with '640', and replace the 'height' value with '480'. There will be an image preview in the bottom of the dialog. Drag the image around in the preview - anything falling outside of the rectangular border that appears in the center of the preview will be cropped out. Move the image around as you desire and when you're satisfied, hit the 'resize' button.
You can test out how well your graphic will work with the grub menus using the overlay graphic above. Download the image, then go to your graphic in the gimp and go to "File > Open as Layer", and select the "Grub_background_preview_overlay.png" file. It should import as a transparent layer on the top of your graphic. Check it out - make sure the grub menu is readable over your graphic - and make adjustments to your graphic as necessary to allow the grub menu to be readable.
When you're ready, go ahead and remove or hide (click on the eyeball icon to hide the layer) the layer with the Grub_background_preview_overlay.png file in it.
Step 4: Index the colors
- Still in the gimp, visit the "Image > Mode > Indexed..." in the menus along the top of the image.
- The "Indexed color conversion" dialog will appear. Under the colormap section towards the top, select the 'Generate optimum palette' option and type in '14' for the 'Maximum number of colors' value.
- In the "dithering" section of the "Indexed color conversion" dialog, select 'Floyd-Steinburg (Reduced color bleeding'.
- Click 'convert'.
- Now the image is 14 colors. Depending on the original image you chose to use, it may now look extremely funkified.
- Sometimes little artifacts show up in the indexed-color version of the image. E.g, you may have dark black spots in a medium blue colored area. What I do in these cases is use the 1px brush with the pencil tool, color drop a medium blue color, and fill in the dark black spots. You can do this quickly by doing:
- 'Select > By color' from the menus, then clicking on the dark black spot color.
- Using the eyedropper tool to select a medium blue you'd like to replace the dark black with
- Click on the paint bucket tool icon. Go to 'Windows > Dockable Dialogs > Tool options'. In the tool options dialog, which show represent options for the paint bucket as that's your selected tool, click the 'Fill whole selection' radio button under 'Affected Area'.
- Click Fill on one of the selected areas of the image. All the black spots should be filled in with medium blue.
Step 5: Create xpm.gz file
- Still in the gimp, go to 'File > Save As ...' and in the "Name" Field type "splash.xpm.gz". I recommend you save to your 'Desktop' folder, and instructions below will assume that's what you did.
Step 6: Test the grub splash
- You'll need root on a Fedora machine.
- as root, cd into /boot/grub
- mv splash.xpm.gz splash.xpm.gz.backup
- copy your splash.xpm.gz created in step 4 to /boot/grub
- reboot.... right after the bios screen keep tapping the 'Esc' key until your grub splash shows up.


